
|
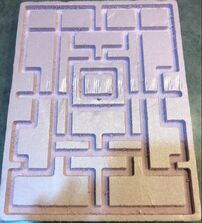
The process of making the maze is similar to 3-D printing but the process is in reverse, it removes materials instead of adding on, to shape the block into a custom shape of a famous maze from a arcade game. To make this I started by going to inventor and make the base shape of the foam block but set the thickness of the block to .5 inch instead of .75 inches to add on the design's shape. For reference I've gone back and forth between an image of the maze and the sketch to have better details.
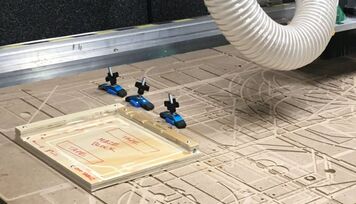
When the model was finished it was uploaded to Fusion 360, once it was loaded I measured the drill bit and applied it to the design. By selecting the base of the shapes it made a tool path in order to simulate the process of cutting the foam. After I double checked the stats and the form I saved the tool path on a flash drive. From there I grabbed the drive and selected a piece of foam to the exact dimensions of the model. In order to have the cutting function properly I centered the drill bit to the center of the foam. Once I loaded up the file and zeroed the co-ordinates to effectively finish the programming of the maze. Once it was all done the CNC router made a maze that all retro gamers will love. |
|
